Next up: waiting for the correct 34" "recording" tachometer cable. Now with firewall attached, we can mount the gascolator. Then we need to finalize windshield strips before instrument panel goes on.
This blog documents my first attempt to restore a vintage aircraft back to it´s original US Army style. This bird was built in Lock Haven (PA) with Piper s/n 13157. Delivered to Army Ground Forces in France late December 1944 (mil. s/n is 45-4417). Still trying to find in which division it served, but this bird probably served the allies on their march towards- and into Germany. Rolled out in June 2015 with maiden flight shortly after.
Sunday, February 8, 2015
Firewall / bootcowl
Today we attached the firewall / bootcowl. A challenge to drill the 3 x 2 horizontal holes. Also working on the sidepanels for avionics, fuel valves and mags. Bending new fuel tubes as well.
Next up: waiting for the correct 34" "recording" tachometer cable. Now with firewall attached, we can mount the gascolator. Then we need to finalize windshield strips before instrument panel goes on.
Monday, January 26, 2015
Propeller, antenna and cabin heat box
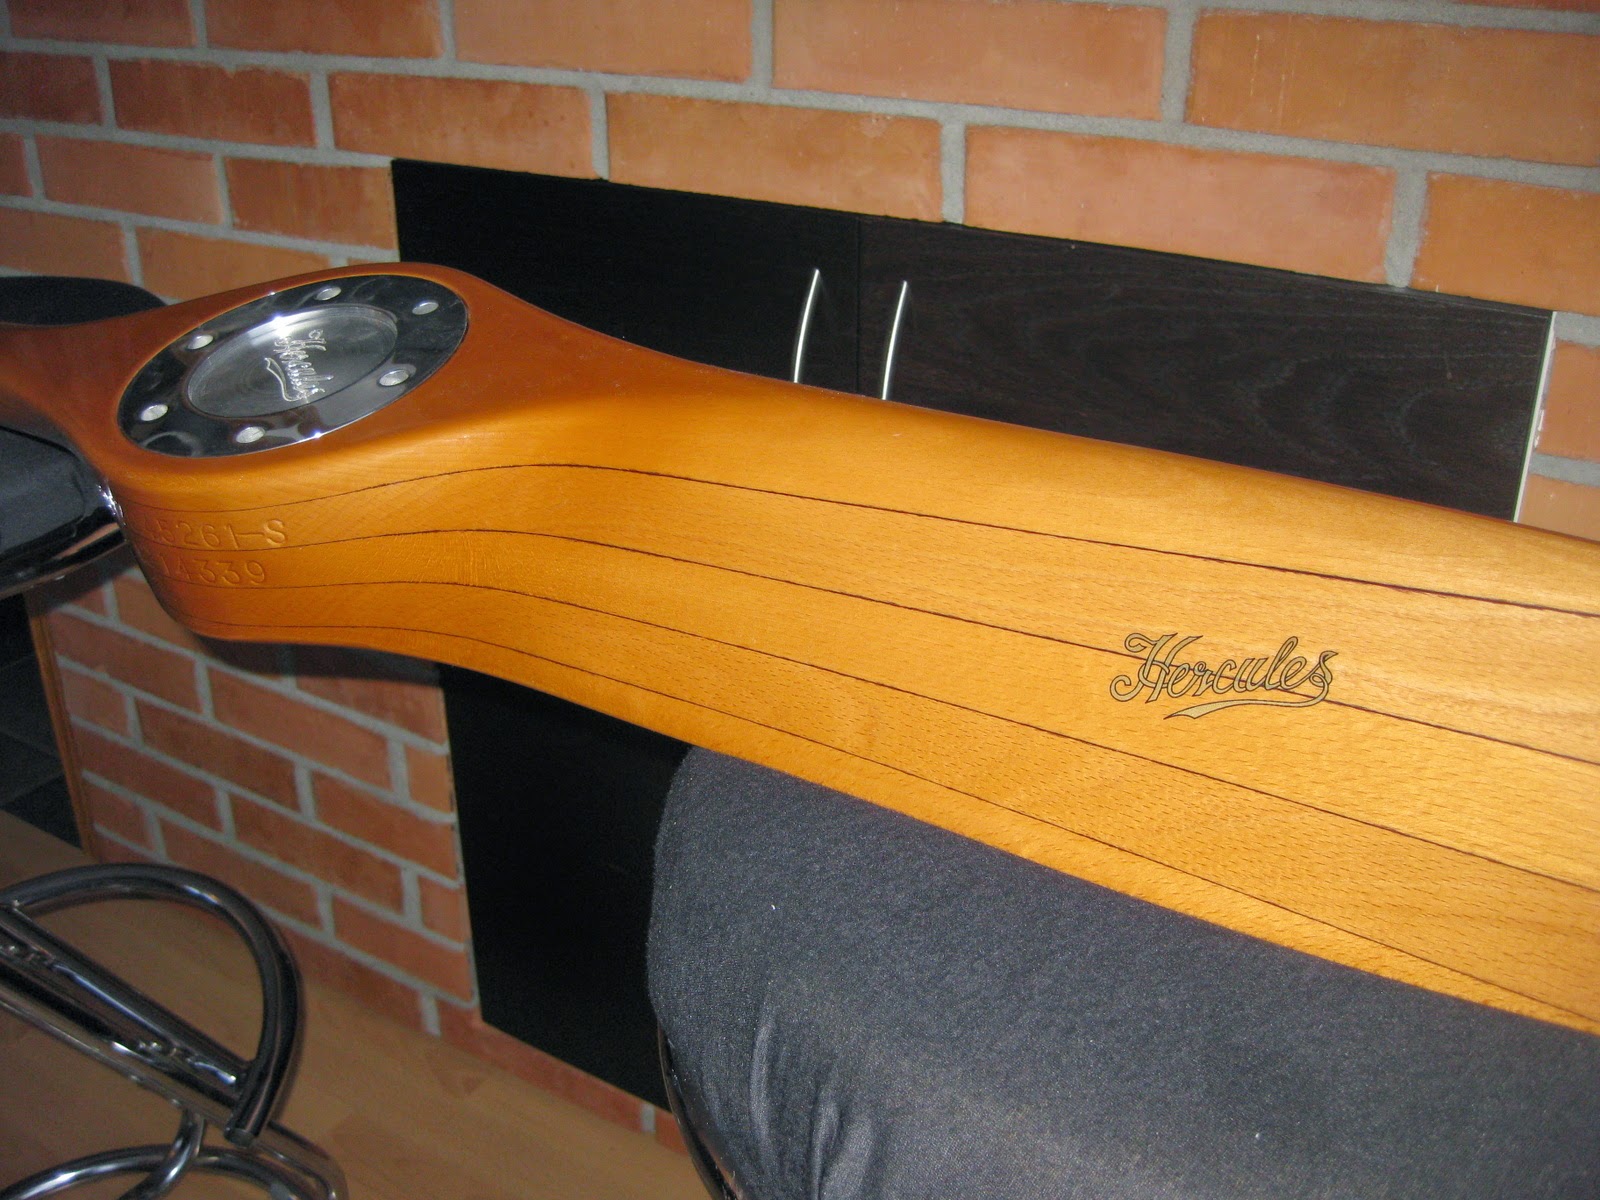
The highlight of the week: the propeller arrived from Hercules Propellers in Britain. It's a coarse cruise prop with muddy green tips matched with the original Sensenich props. The brown leading edge is in carbon, which makes this prop perform slightly better than the original Sensenich prop due less drag. And it's not imitated wood: it's the real thing! Light weight with a nice alu crush plate.
Also, drilled hole for radio AN-29C antenna connected to the BC-659 radio. This antenna is for authentic looks only and will not be in use. Happy with the tight fit using the rubber O-ring. Not a drop of water will pass through there!
Furthermore, installed the cabin heat box to the bootcowl. Getting seriously close to engine and wing installation now.
Also, drilled hole for radio AN-29C antenna connected to the BC-659 radio. This antenna is for authentic looks only and will not be in use. Happy with the tight fit using the rubber O-ring. Not a drop of water will pass through there!
Furthermore, installed the cabin heat box to the bootcowl. Getting seriously close to engine and wing installation now.
| The AN-29C antenna sticking up though the birdcage. |
| 1 kg fire extinguisher, operated with one hand only which is why I selected that particular unit. May spray paint it OD.. |
| Cabin heat box now attached to the bootcowl. Just waiting for the gascolator and tachometer wire now before bootcowl can be attached ONE LAST TIME!! :-) |
| Cabin heat box seen from the inside. |
| There is a kind of system in all this mess... |
Wednesday, January 21, 2015
Noseart
L-4's in the field mostly had very simple nose art. Either nothing at all, or a plain white pencil stroke figure with a name written beside it. The ones that carry noseart today usually puts some more effort into it. And there were some.. that had great nose art but they were very few. My danish L-4 fellows has done a great job on their noseart. However, I also respect the ones arguing that an L-4 should not have nose art as this was very rare in WW2.
A very good friend and "Aviation artist" in the north of Norway has created the below sketch for me. He has chosen Martha Vickers as the model, she was a very popular WW2 pinup girl. A youtube clip here.
Most L-4's has a name, at least today.. I've chosen a cool aviaton name: "Maverick". Why ? Well, ever since the plane came to Norway (1947) it has carried the national registration LN-MAV. Now, every hobby pilot has seen Top Gun at least 8 times, right?.. and Maverick is constantly referred to as "Mav" by his colleagues. But the expression "Maverick" refers to wild cattle which the cowboys needed to catch and brand, often using a lasso.
From Wikipedia:
"Maverick is a term, usually referring to cattle, for an animal that does not carry a brand.[1] In the period of the United States open range, such animals were relatively common. Many cows would give birth in wild or semi-wild conditions, not be located in an annual round up, and their ensuing calf could thus grow to maturity without having been captured and branded for ownership. The term derived from Samuel Maverick, who, among his other claims to fame, was notorious for not branding his cattle. "
So, dressing Martha Vickers as a cowgirl was done to get some connection to a real Maverick wild cow. I'm very grateful to Roald Olsen, the aviation artist for taking such a lot of time and effort to make me a unique nose art. He will be coming down from the north to paint this on the side of my aircraft some time in the spring.
A very good friend and "Aviation artist" in the north of Norway has created the below sketch for me. He has chosen Martha Vickers as the model, she was a very popular WW2 pinup girl. A youtube clip here.
Most L-4's has a name, at least today.. I've chosen a cool aviaton name: "Maverick". Why ? Well, ever since the plane came to Norway (1947) it has carried the national registration LN-MAV. Now, every hobby pilot has seen Top Gun at least 8 times, right?.. and Maverick is constantly referred to as "Mav" by his colleagues. But the expression "Maverick" refers to wild cattle which the cowboys needed to catch and brand, often using a lasso.
From Wikipedia:
"Maverick is a term, usually referring to cattle, for an animal that does not carry a brand.[1] In the period of the United States open range, such animals were relatively common. Many cows would give birth in wild or semi-wild conditions, not be located in an annual round up, and their ensuing calf could thus grow to maturity without having been captured and branded for ownership. The term derived from Samuel Maverick, who, among his other claims to fame, was notorious for not branding his cattle. "
So, dressing Martha Vickers as a cowgirl was done to get some connection to a real Maverick wild cow. I'm very grateful to Roald Olsen, the aviation artist for taking such a lot of time and effort to make me a unique nose art. He will be coming down from the north to paint this on the side of my aircraft some time in the spring.
![]() |
| Martha Vickers and the photo that was used for my noseart. |
![]() |
| Martha Vickers as drawn by Roald Olsen, dressed up as a cowgirl. I'm thinking of also putting a lasso in this picture. |
![]() |
| As it could look on my L-4 (which will be J 43 by the way, not 44). |
![]() |
| Danish L-4 enthusiast and owner Thomas Damm. His son actually painted that noseart - I think it's absolutely stunning! |
![]() |
| My good facebook friend Kenneth Maigaard and his newly restored L-4 - a real D-day aircraft! |
Sunday, January 18, 2015
Birdcage strips
Sunday, January 11, 2015
Panel fitting
Today we fitted the boot cowl once more - and to get it 100% we had to include the instrument panel. This is the first time we're seeing the painted panel in place - I just this it looks really good!
I must admit that the cream face instruments are not right for a J model, it was used on A and B models. I was in the US early in my restoration project, eager as any, and determined to buy the panel when I was there. So that was a result of poor research. However, I'm already working to build a correct panel- I've got the hard-to-find airspeed indicator of type B-8.
Saturday, January 10, 2015
Getting there...
Someone once said about aircraft restoration: "When you think you are 90% done, you're about half way there!". I would like to shake hands with that guy... :-)
A few photos and comments below. Next big milestone is mounting of engine and wings. Hopefully first week of February. Then the big concern is if the L-4 will fit in the hangar with a rather large Cessna 177 RG... Done some measurements, but I think the Cub may need to be elevated so that the wings of the Cessna will go below.
Had to search for gear/coupling components for the generator. Also needed parts for the exhaust system as well as 100 other small things - it all adds up! Propeller is being made by Hercules Propellers in the UK and should arrive soon. Other parts are on it's way now - hopefully the last purchase for a long while...
| All windows now fitted. Working on the strips from pre-cut aluminum. |
| Battery box under front seat. Battery is a 12V Gel battery for MC / scooter. Should do the job well. |
| The aft cover put in place. Waiting for the BC-659 radio box which is still for sandblasting and painting. |
Wednesday, October 15, 2014
Modified gear-legs...
They have been there all along. Well, I exchanged the original MAV gearlegs with the second L-4 I had (LN-RAK). I did not notice anything strange about them - they were restored, painted and hang on the wall. I simply repainted them gray and OD and it was only when we mounted them on the fuselage that I noticed "something" was wrong... could not really put my finger on it, but this was somewhat strange. Walked over to the other L-4 at Kjeller airport (LN-SAI) and compared. Ahhh! MODIFIED gear-legs! Damn!! If I had known I would have kept the ones from MAV originally and sandblasted them.. Anyway, this was a modification done to many J3's on floats. It makes a great step for refuelling and entering the Cub. So we simply glued a strip of black leather to protect the ceconite. With all other modifications to this one, especially birdcage, this is really a minor one.
| The modified gearlegs. A strip of leather will ensure good grip when standing on it for refuelling and stepping in and out. |
| Breaks looks good, it was a big moment to get it back on it's own "feet". |
Wednesday, October 8, 2014
Status...
Hi all, I'm not dead after all! Has been a while since the blog was updated, sorry about that. So what's new: let's start with the bad news... I had a goal all the way to fly Maverick on her 70th birthday, which is December 9th this year, but that is not going to happend. It might have, if I had sacrificed a lot of time and cold hours in the hangar... No reason to rush it, better to enjoy the work and make it good.
Good news: My cousin Sander has joined the restoration and he is much better than me at most practical things! (also the theoretical ones actually...) And better: there are so many tasks that requires more than two hands, i.e. mounting of the fueltank today - try that one alone!! THANKS Sander, I don't know how I would ever finish this project alone, it's enjoyable to work with you.
So, the Maverick is based in the hangar at Kjeller airport now, no longer in my garage. After painting I had the feeling that we were almost at the point where wings goes on, but if I had known ALL the small things still to do, I would definitively brought her back home. Windows was a lot more work than I thought. Using a 6 sqm sheet of LEXAN, scratch resistant and VERY expensive. No room for mistake, very little left over - I guess an L-4 requires more than 4 sqm of window... Anyway, windows are now cut roughly to size. I wanted one single piece for roof, so the main challenge was bending the lexan in the aft part. Heat was considered - lexan does not like it. Cold bending is better, but no plate-bending device could take such a big piece! Then we figured it out - lets cut a 2.5 mm stripe in the lexan, leaving 0.5 mm. It will then bend quite easily along the cut, still leaving a water proof one piece roof. GENIUS! (we think...)
Furthermore, we think we have found a good solution for shoulder harness both in front and rear seat. The front seat harness is often seen attached to the stick screws but we attached it inside the seat cover. First some sewing of the harness was necessary - luckily there is an "automobile furniture workshop" in this area, and the guys there are really helpful. They might give you a fixed price for a job, then when returning to pick it up they might say "Oh, this was not so much work after all", and cut the agreed price by half... I did not know such people existed anymore. Then again, other expenses has been greater than expected at this stage of the project (try a set of new mags with harness, new cowls... it all adds up!).
OK folks, some pictures as usual. And, the new goal is to ENJOY the remaining work. I'm very happy if we get undercarrige and wings mounted before the winter really sets in. If we can put the engine on and start it, that would be a blast! So it will not be a flight for Mavericks 70th, but there will certainly be birthday cake and coffee! Oh, speaking of which, a water boiler and coffee has been brought to the hangar, nice! But the old electric system requires us to lower the volume of the Bose loudspeakers before turning on the water boiler... :-) Thats another discussion BTW: What is the best background music when restoring aircraft ??? Tonight there was anything from jazz to Mötley Crüe...
Good news: My cousin Sander has joined the restoration and he is much better than me at most practical things! (also the theoretical ones actually...) And better: there are so many tasks that requires more than two hands, i.e. mounting of the fueltank today - try that one alone!! THANKS Sander, I don't know how I would ever finish this project alone, it's enjoyable to work with you.
So, the Maverick is based in the hangar at Kjeller airport now, no longer in my garage. After painting I had the feeling that we were almost at the point where wings goes on, but if I had known ALL the small things still to do, I would definitively brought her back home. Windows was a lot more work than I thought. Using a 6 sqm sheet of LEXAN, scratch resistant and VERY expensive. No room for mistake, very little left over - I guess an L-4 requires more than 4 sqm of window... Anyway, windows are now cut roughly to size. I wanted one single piece for roof, so the main challenge was bending the lexan in the aft part. Heat was considered - lexan does not like it. Cold bending is better, but no plate-bending device could take such a big piece! Then we figured it out - lets cut a 2.5 mm stripe in the lexan, leaving 0.5 mm. It will then bend quite easily along the cut, still leaving a water proof one piece roof. GENIUS! (we think...)
Furthermore, we think we have found a good solution for shoulder harness both in front and rear seat. The front seat harness is often seen attached to the stick screws but we attached it inside the seat cover. First some sewing of the harness was necessary - luckily there is an "automobile furniture workshop" in this area, and the guys there are really helpful. They might give you a fixed price for a job, then when returning to pick it up they might say "Oh, this was not so much work after all", and cut the agreed price by half... I did not know such people existed anymore. Then again, other expenses has been greater than expected at this stage of the project (try a set of new mags with harness, new cowls... it all adds up!).
OK folks, some pictures as usual. And, the new goal is to ENJOY the remaining work. I'm very happy if we get undercarrige and wings mounted before the winter really sets in. If we can put the engine on and start it, that would be a blast! So it will not be a flight for Mavericks 70th, but there will certainly be birthday cake and coffee! Oh, speaking of which, a water boiler and coffee has been brought to the hangar, nice! But the old electric system requires us to lower the volume of the Bose loudspeakers before turning on the water boiler... :-) Thats another discussion BTW: What is the best background music when restoring aircraft ??? Tonight there was anything from jazz to Mötley Crüe...
![]() |
| My cousin Sander and myself in deep discussions... |
| Rear seat belts complete. Notice how nice the one-piece top-roof bends towards the rear. |
| Again, the rear seat should harness. It will go nicely over the BC-659 radio box (which is still for sandblasting...) |
![]() |
| Trying out... I'm short, Sander is tall. So we both have to make it work.. |
| Really glad we got the bend in the lexan roof so perfect. This was a major concern for some time... |
| Fueltank installed - and I hope I don't have to do that again... New fuel cap from Univair. |
Friday, August 15, 2014
Paint job
During the project I have used a local workshop "Peer's Sandblåsing" to sandblast, prime and paint some parts. Working with Peer is also Dalius Zazas, a Lithuanan car painter. He was in charge of the paint process which went really smooth. Biggest concern was that after weeks of warm summer weather it suddenly changed when we started painting. Good thing: lots of rain to keep the dust down. Bad thing: night temperatures below 15 deg C which is the critical limit for the hardener. If the hardener process stops it does not resume when temp increases. However, "with a little help from my friends" I got a huge electrical heater from the guys at Aeromech and power from my hangar neighbour Oddan. Thanks!!
Comments below the pictures:
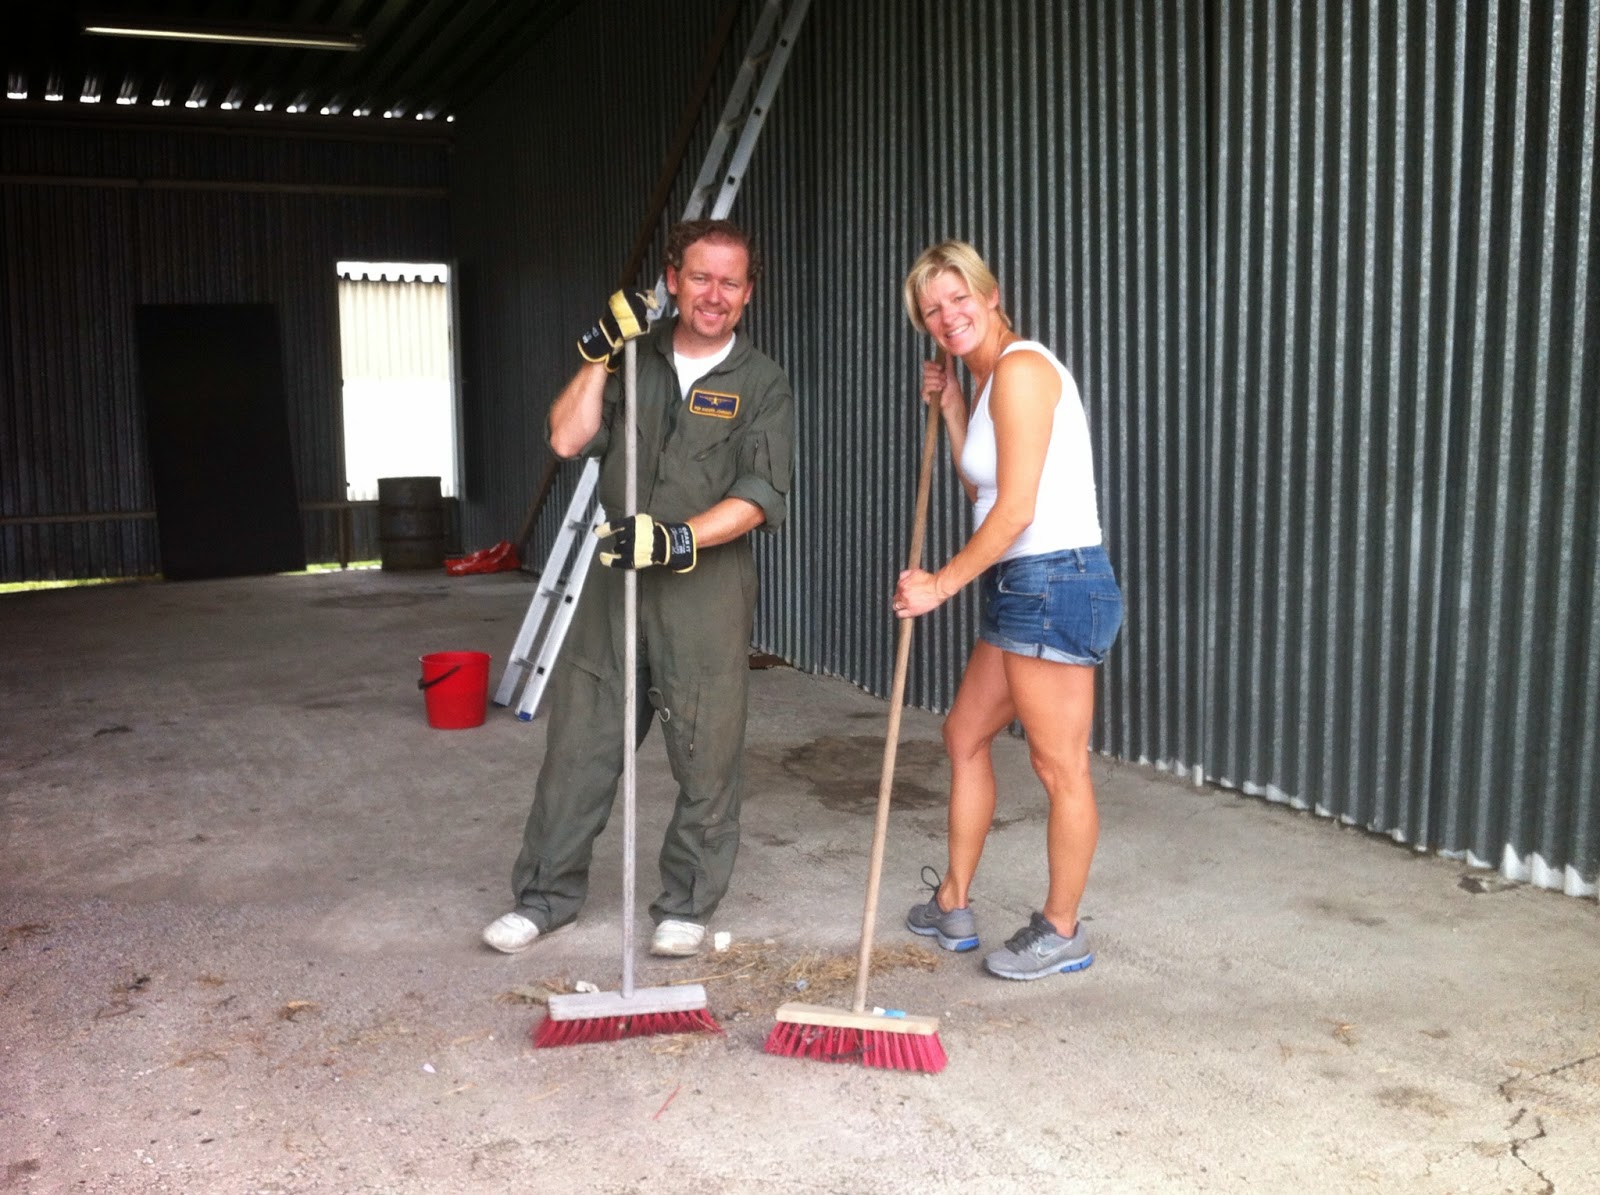
I used Facebook to invite all my friends to a hangar sweeping party, but only my wife turned up... And she made me promise to run 10 km at Oslo Marathon next year in return for her help! Floor was swept with brush and hosed with water. I'm sure that floor was not cleaned since the hangar was built late 70'ies.
First up, final layers of Rand-O-Proof and silver dope.
We decided to start making the invasion stripes. 8" thick, 3 white, 2 black.
Gray color below wings and fuselage. The color cards shows a very dark gray and most restorers tend to select a lighter gray. So did I.
Olive Drab on the wings and fuselage.
Camo Green on the upper side of wings and elevator+rudder. Perhaps we put on a little too much camo. Oh well, the wings will be restored in a few years, no big deal!
Camo on the tail.
Dalius and myself, very happy with the result of 3 long days of work!
Subscribe to:
Posts (Atom)