Thursday, May 22, 2014

Timmy


Last weekend it was again time for the annual Kjeller Airshow "Flydagen". Great airshow: Spitfire, Tigermoth formations, DeHavilland Vampire, L-4J "Timmy" and many more.

Great day, me and my kid Ludvig was there from morning to the end. We got a good look at LN-RAP, the L-4J "Timmy". I also got a lot of useful tips from the owner and restorer Tor Nørstegård. 

Here's some photos:
Apparently "official approval" by Disney! :-)


Mr. Tor Nørstegård, owner and restorer. 

My kid (5), he can't wait to our own L-4 takes to the air. Meanwhile he builds planes in lego.


LN-MAV model

An aviation artist living up north in Norway, Roald Olsen, is among the kindest people I know. He is doing some artwork for us at work - norwegian marble stone tiles with custom carving of aircraft. However, on his spare time he makes models. Lots of them. Not only the aircraft, no this guy makes the jeep with the mechanics, the toolboxes, he puts it all together like it was photos from WW2.

Roald made me an L-4 model based on pictures on our LN-SAI, also located at Kjeller, Norway. However on this one he painted the MAV serial number 54417 on the tail as well as my selected "J 43" unit code. The model is in my office so I can enjoy it all day! 

Roald: THANK YOU MY GOOD FRIEND!!!

And by the way: Roald will travel 1000 miles to come and paint nose art on MAV this autumn! I guess he is practising his Pinup paint skills now... :-)


Wednesday, May 21, 2014

More interior work... and trim!

Hi all, not so much pressure on MAV past couple of weeks, been busy both at work and around the house. Anyway, waited a while for a tiny little trim screw key which in itself costs 50 cents, but with transport, customs, VAT etc. ended up costing as if it was made of gold! Now it's in place and the trim works (quite) well! I can't seem to get the trim indicator to move nicely all the way. I'm guessing that I might have tightened the trim wire too much. I'll make some tests soon, otherwise get another spring.

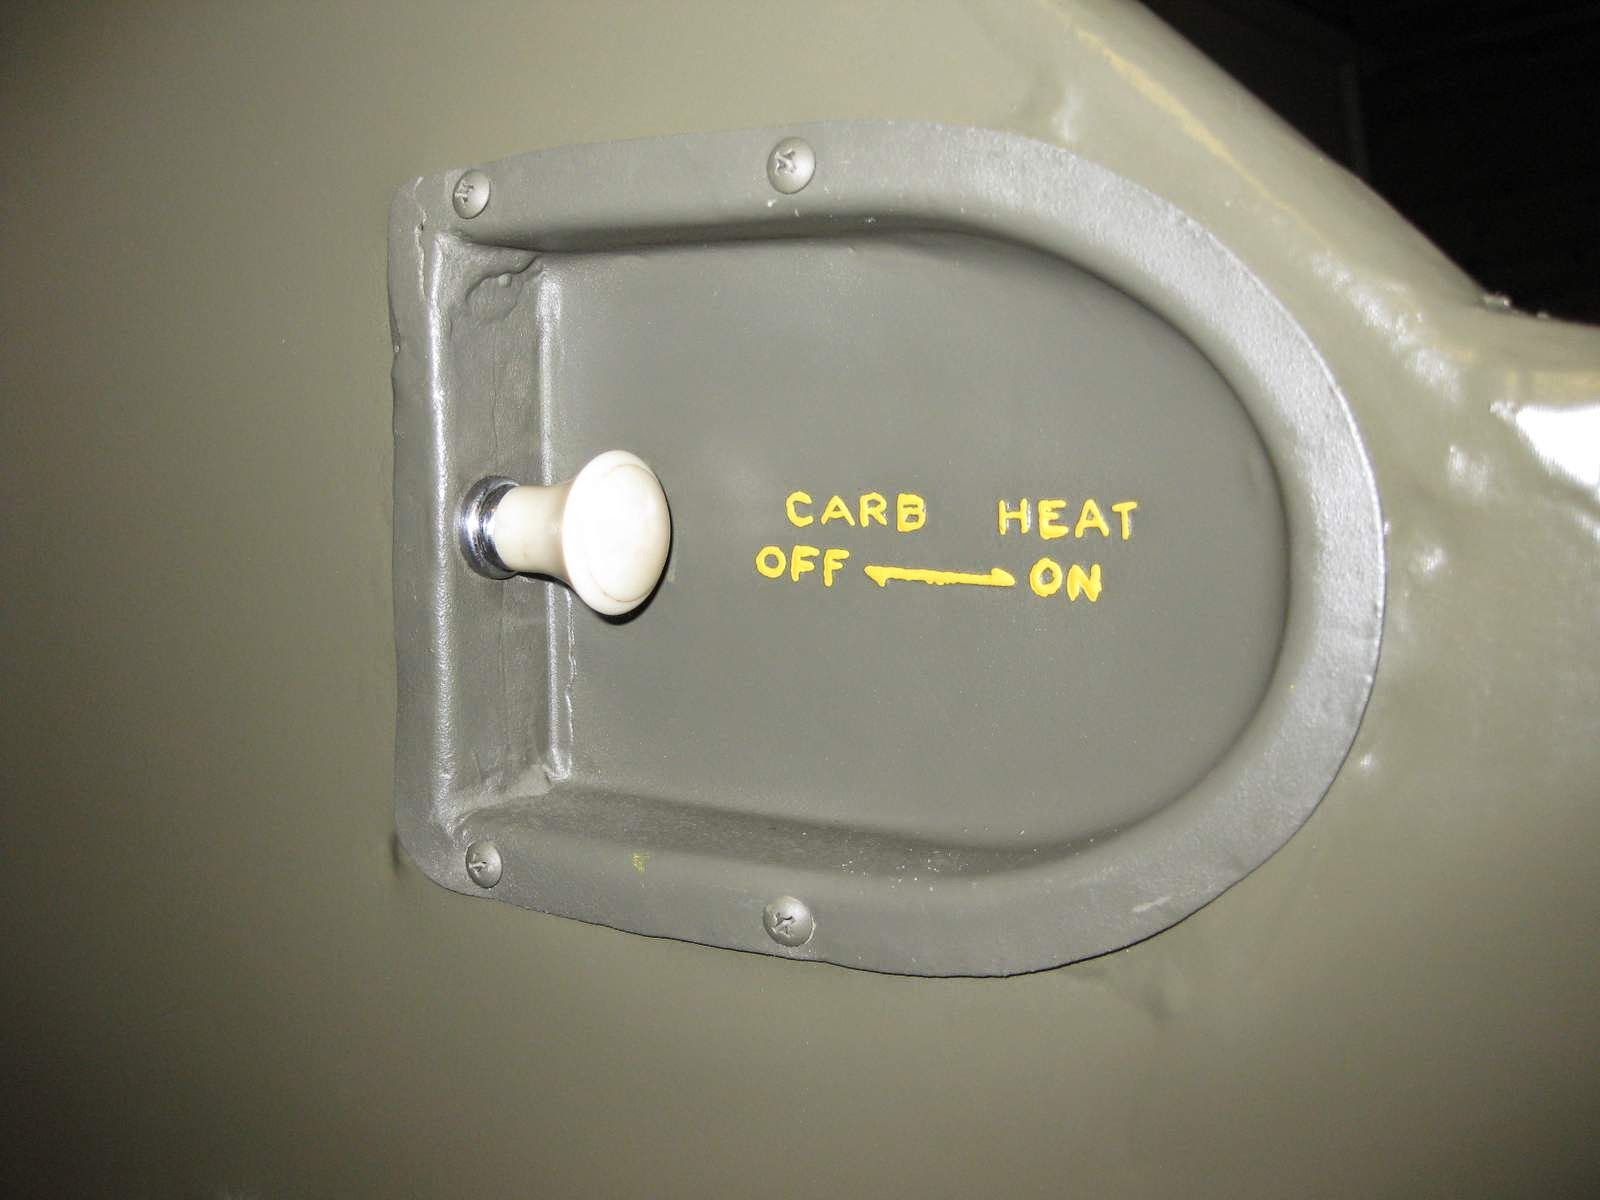
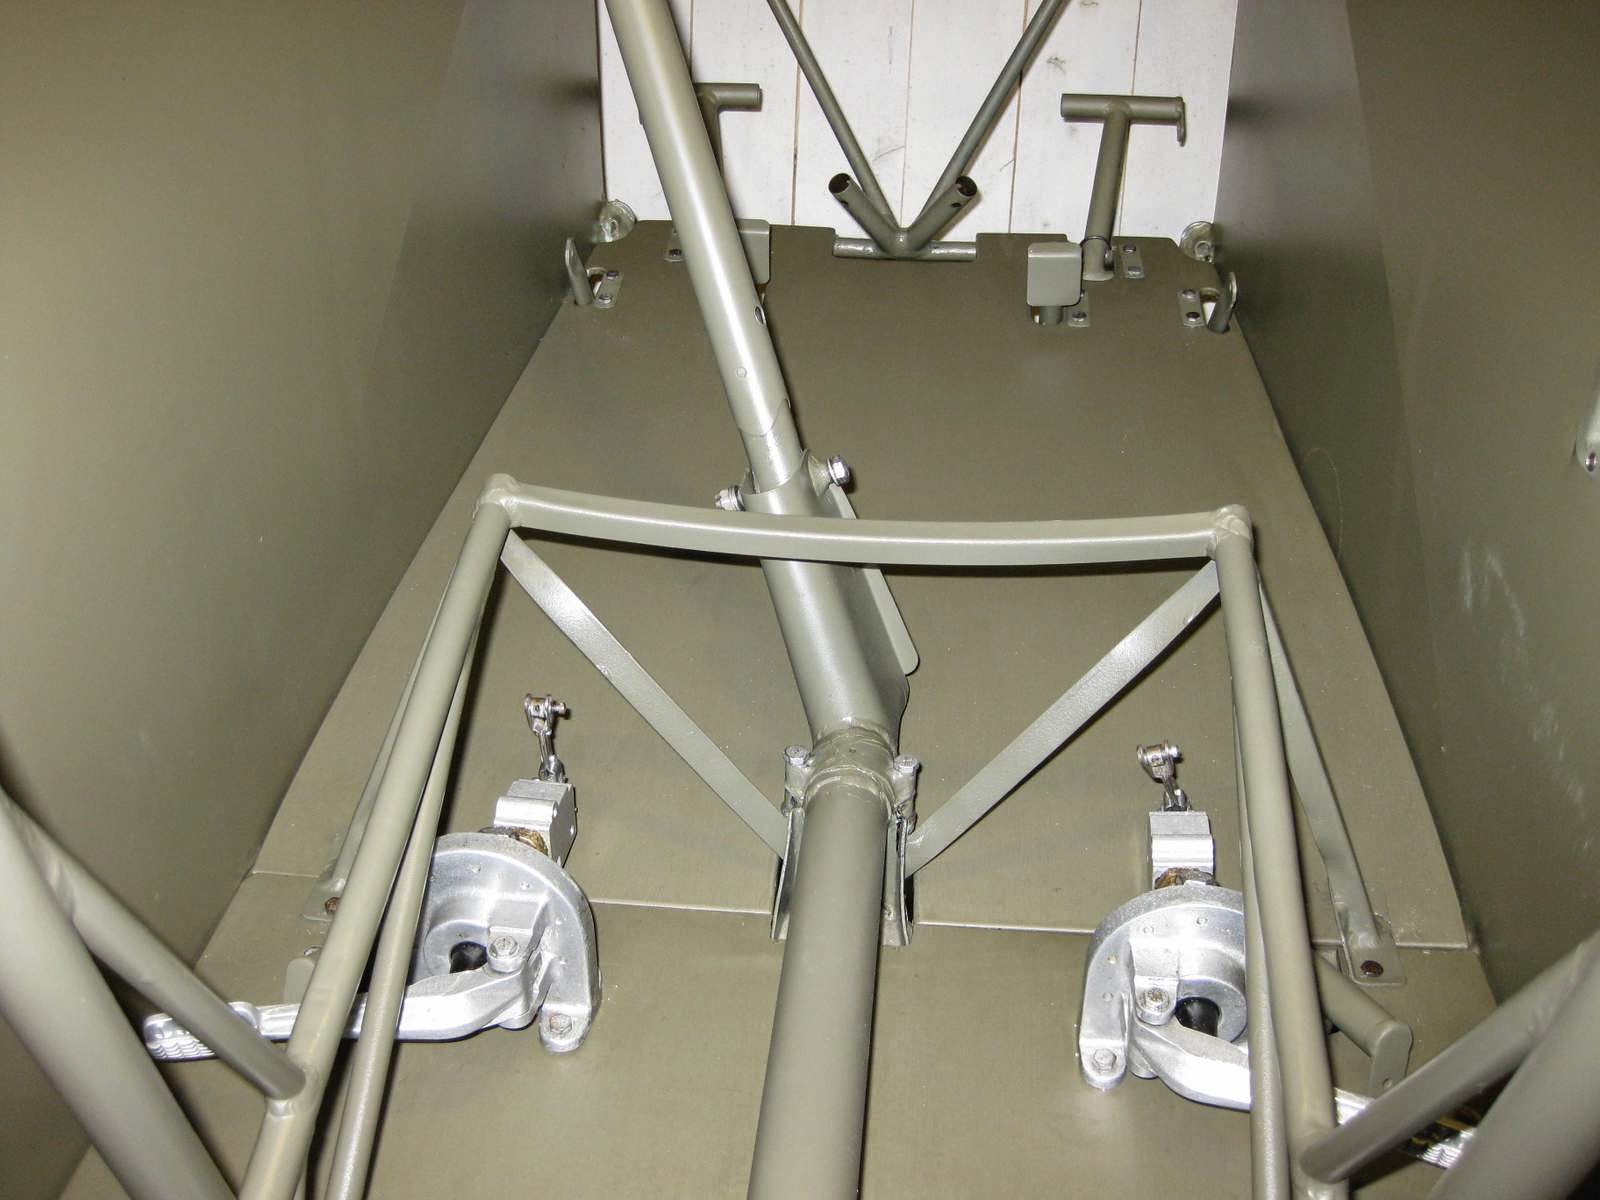
Floor protection plates are in after giving them a good rub. Carb.heat, throttle levers and tonight also fuel controls are put in place. Starting to look like an airplane (at least on the inside!).

Battery has been purchased. A GEL based battery suitable for motorcycle and snow scooter (!), which can be mounted even at 90 deg. The gel makes it less likely to leak. It's a 12 V, 9 Ah battery. It will be placed just behind the front seat to the right of the stick. Covered by the special AAF battery box and I do have the original connector (got it on Ebay). However, I prefer to wire the battery using new AWG-16 wires which has been laid under the floor. The original connector will be there, but only as a dummy.

Next up: fix the trim indicator issue, prime and paint new 3 mm steel rods that go between breake pedals rear and front. Then a very exciting project: A colleague of mine has set out to help me mount a soft ski bag, hidden in the rear fuselage. This must be carefully done so the bag and contents will not in any way reach any control wires. Pictures coming soon!

Need to adjust the tension (I think) to get the trim indicator to move all the way.

Old cups, beaten and repaired - probably the original ones. 

Some fresh red spray paint did well on the fuel controls. Do I have to write "MIXTURE" on the lower one ??? It's experimental anyway, so I might get around that.


The battery position. Still need to build the AAF box around it and I need to decide how to mount the battery properly. It should also be easy to remove for charging, if I don't include a charger in the box.

Monday, May 5, 2014

Interior

Working on the interior these days. Front rudders and breaks were easy to assemble. Rear rudders attach to both front seat as well as break cylinders - they were worse to get in place, mostly because of the rudder pedal spring. Need to call in a friend to help me. Impossible to work alone - you press from the underside and the bolts go back up... Even my wife came out to assist me, which I appreciated very much - a first!!!

However, with some "help from my friends" I will get the rear rudders mounted soon. Wood strips for the BC-659 are in place. First aid kit needs fasteners, I don't know where to get those, must ask on the Cub forum.

Considering if I should put the existing floor protection plates in place or not. Must check if that was original or not. Might go for some plexiglass only - that will protect the floor but hardly be visible at a glance.


Tuesday, April 22, 2014

Test fitting

Test fitting is a wonderful activity - because for just a short time, your airplane looks so much closer to finished! I sat in the MAV today for the first time since teardown. Nice feeling. I got the seats from M. Jones (a guy living in Guam who sells a lot of Cub replica parts on ebay). They fitted nicely and because I'm only 167 cm high, I got extra thick back seat - works perfect for me! (And for the tall guy buying the airplane in future: I couldn't care less!).


Monday, April 14, 2014

Sewing... and some luck on floorboard finish

I noticed that when working on the plane, putting tools etc on the floor, it would leave ugly scratches on the floorboards. I thought a clear top coat would be good and I had some clear wood primer left over and thought that would do the trick... Oh boy! That stuff is made to penetrate into the wood, not to be a top coat... Despite 25 degrees for 48 hours, the stuff was still sticky. Damn! Tried to wipe it off with thinner... Then put on a coat of clear lack for wood floors. Not only did it become dry and smooth, it also bleached the slightly too dark green into a PERFECT color match! So I put on 3 layers of that stuff. Now I have durable floorboards, leaves no scratches at all, and the color became perfect. What seemed to become a nightmare turned out to be the best solution! It delayed the progress by 2 days though...


So now I have put in the floorboards for the final time (and it's the third time I say that). Started to mount control sticks, nice to see it starting to look like an airplane inside.


I've never been good at needlework... Neither is my wife, so I just had to give it a try! I thought the best way to mount the back wall fabric (from Dick Hall) was to sew it around the tube. I suppose that was how it was made originally, correct me if I'm wrong. Anyway, not proud of the estetics, but nevertheless the damn thing is now mounted properly and the shelf will cover the traces..  :-)


Mounted the ELT plate and tray. I think those old ELT's are still allowed on Annex 2 airplanes, so I'll try to get hold of one from the local avionics shop.


Friday, April 4, 2014

Wiring harness

Before floorboards are permanently fixed, we need to lay down the cables bundles. My good colleague Bjørn Terje at work made three nice bundles today, thanks! During the weekend they will be attached to the tubes under the floor using waxed chord. Some spare wires is added for future use.

Since LN-MAV is in the EXPERIMENTAL category, I don't have to care about STC's etc. I'm thinking to make a ground plane for 3 antennas below the fabric aft of the wall behind the BC-659:

- GPS antenna
- Transponder antenna
- ELT antenna

For VHF antenna, I'm trying to modify the AN-29-C original antenna. Using a Sitemaster, we will try to find a length that works well with 118-134 MHz. If unsuccessful, perhaps a RG400 COAX cable inside the antenna and connected to a whip antenna for VHF at the top. This way, there will be no antennas visible that was not there during WW2 service.


3 bundles of wiring harness. All aircraft approved cables and harness.

The simple wiring diagram.


Thursday, March 27, 2014

Back in the garage

Early spring is here and the car has been swapped with the MAV in the garage! Good to have her back in the garage at home, which from now on is called the hangar. Need to mount all controls, trim, wire harnesses, tank, instrument panel etc. When all that is done, I'll take her back to Kjeller for full body covering.
The BC-659 radio box shows below. However, the radio box needs sandblasting except for the front plate which was a spare part never used. Looking at the back seat curved tube, it looks almost as if it's too low. I don't think there should be as much as an inch gap between the wooden shelf and the tube. Will have to check that.
Floorboard color is a hint darker than the OD on the walls. I could off course give the floorboards a top coat with the Sikkens Autocoat OD which is used on the ceconite, but I don't know how the auto paint will stick to the wood in the long run, I'm afraid it might peal off. The floorboard paint is outdoor paint for wood, so that should keep well. I think I will tolerate the slightly different OD variant there.


Tuesday, March 25, 2014

Text on plates

This was hard! I have seen some really nice ones out there, wonder how they did it... I used a 1-2 mm brush and was not happy with the outcome. Too much wine ?... Nope. I guess the best solution would have been a kind of marker pen which leaves enough paint. Oh well, I'll let it dry and ask some advice before trying again.


Friday, March 21, 2014

Sandblaster

Picked up parts from the local sandblaster. He's a nice guy, ha has done many other projects for aircraft restoration for the local museum. His father was a ME109 pilot for the Luftwaffe in WW2...
Parts look great. Next week I will take the fuselage from the airport back into my garage - then hopefully the project will gain momentum!


Sunday, March 9, 2014

Parts from Dick Hall

It was a good day yesterday. All parts produced by Dick Hall arrived, as well as new color sample cards from Steve Dunn (I think I have lost the ones I had). Anyway, the L-4 specific parts from Dick Hall is essential to any authentic L-4. These are parts that was specific for military deliveries and you can't get them anywhere else unless you make them yourself. They are:

- Map holder to go on the aft right side wall
- Sheet metal bow for protecting elevator control wires
- Aft fuselage cover
- Observer seat back belts
- L-4 Checklist

We fly the J3's / L-4's from the back seat only in Norway. However, for static display on air shows etc. it will be good to show how it was used in the ETO during WW2. The OD color also matches mine pretty well. Very satisfied! :-)


Wednesday, March 5, 2014

First attempt to cover

My first ever experience with covering an airplane! Using ceconite 102. It's time consuming, but with patience and good guidance from the Aeromech guys, it went fairly well. Did the insides of the fuselage today so the floorboards can go in next. Then at the end of this week I should get some parts from the sandblaster.


Sunday, March 2, 2014

Slowly, but getting there...

Hi all, I'm not dead! It's been a while since last status update. So whats new:

- Fuselage welding work complete.
- Wing tip bows repaired - wings ready for paint!
- Firewall fitted to fuselage and front window.
- Stringers mounted.
- Floors fitted and painted.
- Trim parts being assembled now.

This is how she looks now:


Wooden stringers assembled using waxed chord, the type used for wiring harness etc. I was recommended this in order to avoid the tape protecting tubes from the safety wire. The chord is more gentle to the tubes and should not keep moist as protecting tape would do.


Next week I will be covering the inside sidewalls, so the floorboards can be mounted for good. Then starts assembly of breaks, rudders and all the inside mechanics. Break cylinders was taken apart the other night. It's amazing how LL100 AVGAS will work as cleaning fluid! Look at the break cylinders below - where else can you get effective cleaning chemicals for 2 Euros per liter! ?


Finally, I mentioned the wing tip bows was repaired. Got new bows from Univair. Wings are basically ready to be sprayed OD. Will try to do most of the paint job myself when spring gets here with warm temperatures. NB! Wings will be restored in "a few seasons" from now. They are in pretty good shape and was thoroughly inspected when opened.


Oh, almost forgot! Rudder pedals all had a bad deep cut, probably from wear against the tight spring. At my uncles summer party in Sweden, I met a former SAS aircraft welder (Scandinavian Airline Systems). He is one of those who said he would help out - and kept his word! I handed him the pedals and he repaired them nicely ready for priming and paint. I'm spraying the minor parts up in the garage loft, but my wife will kill me when she notices that all clothes etc. kept up there now smells of thinner and paint... wish me luck.


Wednesday, November 27, 2013

Stringers

Tonight I finished making the wooden stringers for the sides and underneath fuselage. Simply used the previous stringers as templates for the new ones. Could find matching pre cut lists in Oslo. The longest one I had to make from two pieces, joining them with a scrap metal piece from an IKEA shelf...

Gave the stringers and the floor boards a good coat of "Visir Olje-grunning". Thats what we put on outside walls for wooden houses as a first layer. Must give it 2-3 days for drying in these low temperatures, and then the first layer of OD wood paint. Will be exciting to see how well the paint shop matched the OD on this type of paint. Hope I'm not rushing this, I know I should have had a second floor board fitting at the hangar...


Tuesday, November 19, 2013

Olive Drab color

"OD". Olive Drab. The US military green camouflage color. Apparently, it's not easy to say: "This is Olive Drab green". First of all, US Army changed the standard OD several times. It really depends on which year your OD was painted. Then there were differences in batches of color. In the field, they most likely used whatever mix they had... And I guess there is no easy way to mix OD based on the old color-definitions in todays system.

Luckily we have enthusiasts who gladely spends months and even years investigating this type of details. Steve, running L-4 owners page on Facebook and Paul Smith are amongst those brave men. The rest of us can just sit back and wait for their decision: What is the correct OD color? They did not have an easy job. Most pictures from the time is B/W. The few color images are faded, and so are most samples of fabric or cowlings still with original color.

Talk about timing! As I was just starting to think about OD, the L-4 owners Facebook page was full of results from Steve's experimenting with OD. By the time I needed a color card, Steve had just produced 12 sample color cards of:
- No 613 Olive Drab
- No 612 Medium Green (for camo pattern around the wings and tail)
- No 603 Sea Gray (under wings/fuselage)
- No 614 Orange Yellow (for tail Serial Number)

Getting my hands on a set of those color cards saved me a lot of time. So, how to get my hands on some paint ? I went to see a local car painter. His laser-scanner only came up with a 90% match and he was not even willing to try and mix it "by hand". So much for "specialists". Turns out that a small car parts warehouse in Lillestrøm (BilXtra) got a 100% match with a german Autocoat BT MM Mercedes Benz Truck paint (DBT6844). I'm putting german paint on an aircraft that was built to neutralize german military 70 years ago! How about that! :-)

I decided to treat the fuselage tubes with a coat of this paint on top of the old Hansa Primer. Just to give it an additional coat. The real find of the day was when I discovered that the inside of one wing pulley fairing cup still had OD! And there is no other paint or primer under it, so I'm thinking this is the original from 1944. I think it matches Steve's color sample card damn fantastic, well done Steve! Some photos below.


The fuselage on it's way from my garage to the hangar at Kjeller airport (ENKJ). Will bring it back early spring, hopefully in March. Having it in my garage is the only way to get steady progress.