Hi all, I'm not dead! It's been a while since last status update. So whats new:
- Fuselage welding work complete.
- Wing tip bows repaired - wings ready for paint!
- Firewall fitted to fuselage and front window.
- Stringers mounted.
- Floors fitted and painted.
- Trim parts being assembled now.
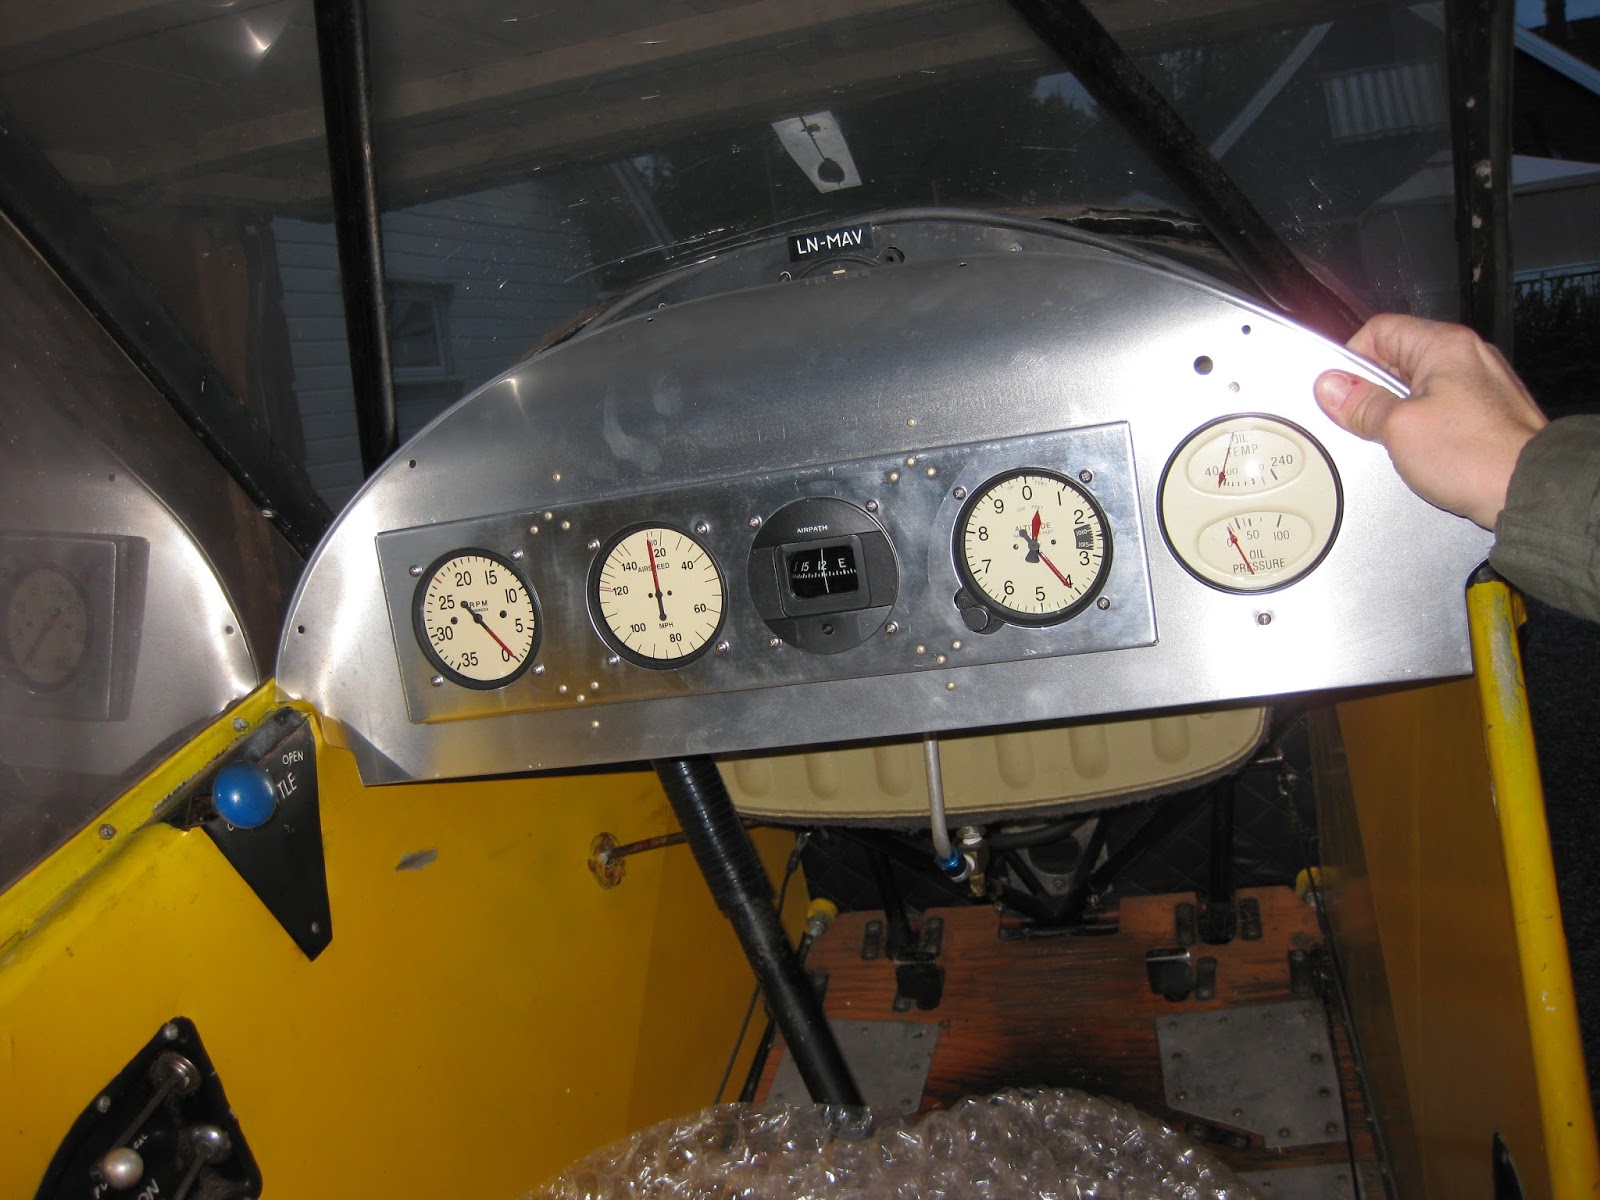
This is how she looks now:
Wooden stringers assembled using waxed chord, the type used for wiring harness etc. I was recommended this in order to avoid the tape protecting tubes from the safety wire. The chord is more gentle to the tubes and should not keep moist as protecting tape would do.
Next week I will be covering the inside sidewalls, so the floorboards can be mounted for good. Then starts assembly of breaks, rudders and all the inside mechanics. Break cylinders was taken apart the other night. It's amazing how LL100 AVGAS will work as cleaning fluid! Look at the break cylinders below - where else can you get effective cleaning chemicals for 2 Euros per liter! ?
Finally, I mentioned the wing tip bows was repaired. Got new bows from Univair. Wings are basically ready to be sprayed OD. Will try to do most of the paint job myself when spring gets here with warm temperatures. NB! Wings will be restored in "a few seasons" from now. They are in pretty good shape and was thoroughly inspected when opened.
Oh, almost forgot! Rudder pedals all had a bad deep cut, probably from wear against the tight spring. At my uncles summer party in Sweden, I met a former SAS aircraft welder (Scandinavian Airline Systems). He is one of those who said he would help out - and kept his word! I handed him the pedals and he repaired them nicely ready for priming and paint. I'm spraying the minor parts up in the garage loft, but my wife will kill me when she notices that all clothes etc. kept up there now smells of thinner and paint... wish me luck.