Tonight I finished making the wooden stringers for the sides and underneath fuselage. Simply used the previous stringers as templates for the new ones. Could find matching pre cut lists in Oslo. The longest one I had to make from two pieces, joining them with a scrap metal piece from an IKEA shelf...
Gave the stringers and the floor boards a good coat of "Visir Olje-grunning". Thats what we put on outside walls for wooden houses as a first layer. Must give it 2-3 days for drying in these low temperatures, and then the first layer of OD wood paint. Will be exciting to see how well the paint shop matched the OD on this type of paint. Hope I'm not rushing this, I know I should have had a second floor board fitting at the hangar...
This blog documents my first attempt to restore a vintage aircraft back to it´s original US Army style. This bird was built in Lock Haven (PA) with Piper s/n 13157. Delivered to Army Ground Forces in France late December 1944 (mil. s/n is 45-4417). Still trying to find in which division it served, but this bird probably served the allies on their march towards- and into Germany. Rolled out in June 2015 with maiden flight shortly after.
Wednesday, November 27, 2013
Tuesday, November 19, 2013
Olive Drab color
"OD". Olive Drab. The US military green camouflage color. Apparently, it's not easy to say: "This is Olive Drab green". First of all, US Army changed the standard OD several times. It really depends on which year your OD was painted. Then there were differences in batches of color. In the field, they most likely used whatever mix they had... And I guess there is no easy way to mix OD based on the old color-definitions in todays system.
Luckily we have enthusiasts who gladely spends months and even years investigating this type of details. Steve, running L-4 owners page on Facebook and Paul Smith are amongst those brave men. The rest of us can just sit back and wait for their decision: What is the correct OD color? They did not have an easy job. Most pictures from the time is B/W. The few color images are faded, and so are most samples of fabric or cowlings still with original color.
Talk about timing! As I was just starting to think about OD, the L-4 owners Facebook page was full of results from Steve's experimenting with OD. By the time I needed a color card, Steve had just produced 12 sample color cards of:
- No 613 Olive Drab
- No 612 Medium Green (for camo pattern around the wings and tail)
- No 603 Sea Gray (under wings/fuselage)
- No 614 Orange Yellow (for tail Serial Number)
Getting my hands on a set of those color cards saved me a lot of time. So, how to get my hands on some paint ? I went to see a local car painter. His laser-scanner only came up with a 90% match and he was not even willing to try and mix it "by hand". So much for "specialists". Turns out that a small car parts warehouse in Lillestrøm (BilXtra) got a 100% match with a german Autocoat BT MM Mercedes Benz Truck paint (DBT6844). I'm putting german paint on an aircraft that was built to neutralize german military 70 years ago! How about that! :-)
I decided to treat the fuselage tubes with a coat of this paint on top of the old Hansa Primer. Just to give it an additional coat. The real find of the day was when I discovered that the inside of one wing pulley fairing cup still had OD! And there is no other paint or primer under it, so I'm thinking this is the original from 1944. I think it matches Steve's color sample card damn fantastic, well done Steve! Some photos below.
Luckily we have enthusiasts who gladely spends months and even years investigating this type of details. Steve, running L-4 owners page on Facebook and Paul Smith are amongst those brave men. The rest of us can just sit back and wait for their decision: What is the correct OD color? They did not have an easy job. Most pictures from the time is B/W. The few color images are faded, and so are most samples of fabric or cowlings still with original color.
Talk about timing! As I was just starting to think about OD, the L-4 owners Facebook page was full of results from Steve's experimenting with OD. By the time I needed a color card, Steve had just produced 12 sample color cards of:
- No 613 Olive Drab
- No 612 Medium Green (for camo pattern around the wings and tail)
- No 603 Sea Gray (under wings/fuselage)
- No 614 Orange Yellow (for tail Serial Number)
Getting my hands on a set of those color cards saved me a lot of time. So, how to get my hands on some paint ? I went to see a local car painter. His laser-scanner only came up with a 90% match and he was not even willing to try and mix it "by hand". So much for "specialists". Turns out that a small car parts warehouse in Lillestrøm (BilXtra) got a 100% match with a german Autocoat BT MM Mercedes Benz Truck paint (DBT6844). I'm putting german paint on an aircraft that was built to neutralize german military 70 years ago! How about that! :-)
I decided to treat the fuselage tubes with a coat of this paint on top of the old Hansa Primer. Just to give it an additional coat. The real find of the day was when I discovered that the inside of one wing pulley fairing cup still had OD! And there is no other paint or primer under it, so I'm thinking this is the original from 1944. I think it matches Steve's color sample card damn fantastic, well done Steve! Some photos below.
The fuselage on it's way from my garage to the hangar at Kjeller airport (ENKJ). Will bring it back early spring, hopefully in March. Having it in my garage is the only way to get steady progress.
Floor boards
Norwegian winter is here and the Cub had to move to the hangar at Kjeller airport (ENKJ). My wife was happy to park in the garage again now that the car windows are frozen each night. Anyway, I still have a lot of parts up here to work with.
Floor boards: A plate of 6.5 mm thick, 5 layers plywood from Oslo Finérfabrikk was purchased. Fine finish (much better than at the local builders warehouse), and the glue is suppose to be water-resistant... The old floor boards were naturally used as templates for the new ones. But.. since I plan to actually use the baggage-compartment behind the rear seat, I decided to put floors there as well. It was on the original L-4's, obviously for the observer who sat facing rearwards and he must have had some floor to rest his feet. I have never seen an original drawing of how these L-4 rear floor boards were cut. I'm going to try something I've never seen before: one long piece reaching from under the front seat all the way back past the baggage compartment.
Boards are now ready for fitting. I need to bring them down to the airport and try them out and make adjustments. Then, when all fitted, I will give them 3 coats of olive drab paint used for wooden houses. Type "Drygolin Extreme" was the toughest paint they could recommend. The plywood is in fact so nice in itself, that it hurts me to paint it olive drab. I really like the brown wooden finish, but it would simply not be authentic for the L-4's. I guess US Army pushed Piper pretty good regarding price (approx. 2000 USD per aircraft!) and so the whole interior were simply sprayed olive drab. All of it! Boring yes, but authentic for it's time.
The MAV came with really nice floor protection metal sheets which I will reuse, authentic or not... At some point you've got so decide where to draw the line. I'm happy with an aircraft I can say is "very close to the original". Wingtanks, 90 HP engine... there's so many things anyway that breaks with the original specs. Some L-4 enthisuasts will disagree with me (sorry...) but thats life.
I'm happy with the result of the floor boards so far. More pictures after fitting and painting. Next up: wooden stringers (side and bottom).
Floor boards: A plate of 6.5 mm thick, 5 layers plywood from Oslo Finérfabrikk was purchased. Fine finish (much better than at the local builders warehouse), and the glue is suppose to be water-resistant... The old floor boards were naturally used as templates for the new ones. But.. since I plan to actually use the baggage-compartment behind the rear seat, I decided to put floors there as well. It was on the original L-4's, obviously for the observer who sat facing rearwards and he must have had some floor to rest his feet. I have never seen an original drawing of how these L-4 rear floor boards were cut. I'm going to try something I've never seen before: one long piece reaching from under the front seat all the way back past the baggage compartment.
Boards are now ready for fitting. I need to bring them down to the airport and try them out and make adjustments. Then, when all fitted, I will give them 3 coats of olive drab paint used for wooden houses. Type "Drygolin Extreme" was the toughest paint they could recommend. The plywood is in fact so nice in itself, that it hurts me to paint it olive drab. I really like the brown wooden finish, but it would simply not be authentic for the L-4's. I guess US Army pushed Piper pretty good regarding price (approx. 2000 USD per aircraft!) and so the whole interior were simply sprayed olive drab. All of it! Boring yes, but authentic for it's time.
The MAV came with really nice floor protection metal sheets which I will reuse, authentic or not... At some point you've got so decide where to draw the line. I'm happy with an aircraft I can say is "very close to the original". Wingtanks, 90 HP engine... there's so many things anyway that breaks with the original specs. Some L-4 enthisuasts will disagree with me (sorry...) but thats life.
I'm happy with the result of the floor boards so far. More pictures after fitting and painting. Next up: wooden stringers (side and bottom).
Monday, October 7, 2013
Teardown done!
It's with great pleasure I announce that the teardown process is over - have spent the weekend starting the rebuild! Fuselage has been (weeks ago) spot-primed where original primer was thin. Now the whole fuselage has got a coat of Olive Drab 2-component Mercedes Benz Truck paint (!). At "BilXtra" in Lillestrøm they are good with color matching. They found a color match based on Steve's color cards on just that type. Ironically I'm now putting on german high quality paint on an aircraft used to spot and destroy german gear 70 years ago!
Had to get a 3000 Watt heater to keep temperatures above 15 C. Started out using regular paint brush, but realized it would take weeks... Found that kitchen sponges did the trick, used the brush just in the welded joints. About half a liter was enough to cover a thin layer on the whole fuselage (excluding control surfaces). Thats good, the stuff was expensive! (about 150 USD for a liter!).
With the OD colored tubes it starts to look more authentic and military. A nice motivation-boost and it will now be better protected in a cold hangar the rest of the winter.
Sunday, September 29, 2013
Monday, August 5, 2013
Fuselage cleaning
Everything on the fuselage is now disassembled. That sounds like a lot of work, but on a Piper Cub it's really not that bad. Carefully taking notes and lots of photos to document how it all should go back in place. Then starts the fun: rubbing off the old ceconite that (no matter how carefully you take the old cover off) will stick to the tubes.
I'm very careful when it comes to using chemicals - probably too much. I asked the old guys at the airport what type of glows they used and their reply was "Glows ?...". But you should see their hands...
Found one slightly bent tube on the right side under the elevator. Will have to get this repaired and assessed by a mechanic.
Sunday, July 28, 2013
Project formal approval
Due to holidays, the formal acceptance of the restoration project came only a few days ago. However, I knew the EAA had recommended it before the summer. Nevertheless, this is a final GO for the complete restoration of LN-MAV (now called "Maveric"). It's a good thing that the Norwegian CAA approves this type of projects as EAA Experimental Category. This is the only way to rebuild these wonderful old Cub's for a reasonable price tag.
Saturday, July 13, 2013
Older photos of MAV
Helge Brun, previous owner and restorer, sent me some very nice photos of MAV, both before and after last restoration. I especially like the photo of MAV on ski's with the horses... What a tru norwegian winter experience! Thanks for the photos, Helge!
Status: another 5 hours and the fuselage will be completely stripped, ready for wash and a coat of paint. Wondering if I should buy new parts from Univair or if I should bid on a similar L-4J which is 70% finished... Would give me all restored firewall, cowling, struts (new), propeller... And the kit includes restored floats for J3, skis, new tires, engine in unknown condition... and a pair of newly covered wings. Tempting. I might give a bid.
New leather seats arrived from Don, new canvas slings as well. Got an extra 2 inches put into the rear seat so I can see better. Plywood floor and shelf will be made soon. Must get some paint soon, with the original Olive Drab color. Summer holiday now so I should get some more time.


Status: another 5 hours and the fuselage will be completely stripped, ready for wash and a coat of paint. Wondering if I should buy new parts from Univair or if I should bid on a similar L-4J which is 70% finished... Would give me all restored firewall, cowling, struts (new), propeller... And the kit includes restored floats for J3, skis, new tires, engine in unknown condition... and a pair of newly covered wings. Tempting. I might give a bid.
New leather seats arrived from Don, new canvas slings as well. Got an extra 2 inches put into the rear seat so I can see better. Plywood floor and shelf will be made soon. Must get some paint soon, with the original Olive Drab color. Summer holiday now so I should get some more time.
Sunday, June 23, 2013
Garage has become hangar!
The garage is now converted to hangar. However, my wife insisted on space for her car, but she never bothers to drive into the garage anyway... :-) Having the aircraft at home is the only way I can throw in a little time every day. I have a 25 min drive to the airport, so then an hour is lost in driving only.
Part by part is now coming off while taking photos so I can get it all back in the same way! Will soon start to rub off the remains of the old seconite.
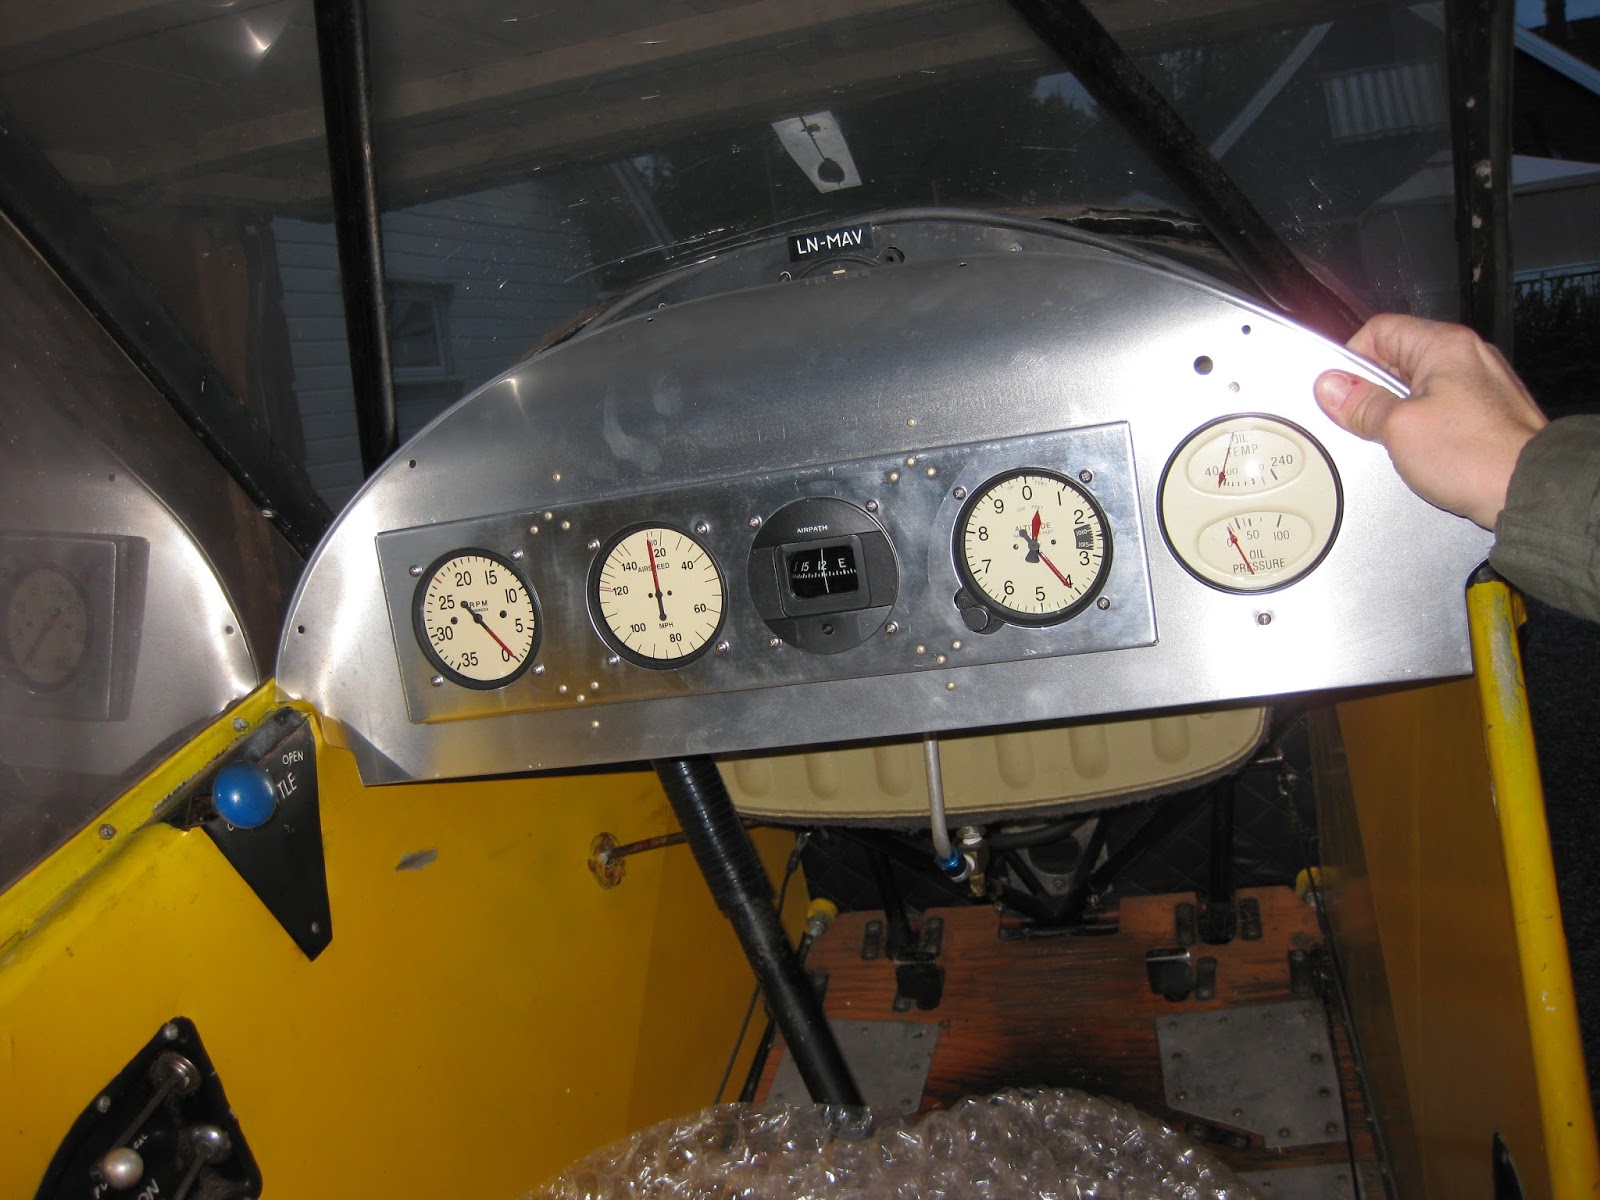
..and the new panel will look real nice!
Part by part is now coming off while taking photos so I can get it all back in the same way! Will soon start to rub off the remains of the old seconite.
..and the new panel will look real nice!
Monday, June 3, 2013
Engine comes off
Restoration is initially a backward process... the airplane will look less and less like an airplane for a while now. And then right at the end, it all (hopefully) comes together!
For a software engineer like me, there is something "masculine" about removing a C90 engine without the help of a professional mechanic! :-) The Piper Cub is said to be a simple airplane, but there is still a lot of wires and stuff going through the firewall. But, it was easy and now the engine is at the local workshop Aeromech where it will be overhauled later this year. Lets hope there is no corrosion found... At least it runs smooth. With the engine off, the fuselage is now just short enough to fit on my garage at home. Will shortly bring it home where I will be able to do a little each day. Things are looking good!
Tuesday, May 28, 2013
13157 Build Sheet
Today I received the build sheet from Clyde Smith Jr. in the mailbox (thanks to Clyde for being such a fantastic resource to all restoring old Cub´s!). It´s a transcript of the original manufacturing record. It was produced and rolled out (same day? don´t think so...) on December 9th 1944, signed out by D. Snyder. Now I can check if the original fuselage and wings are still on, or if major parts has been replaced during the years. The original C65 engine is changed to a C90, as with most L-4´s around today. Yet another piece of the big puzzle is now in place!
Sunday, May 19, 2013
Cub bear & x-rays...
My daughters Ingelin and Linnéa thought I could need a "lucky-bear" in my Cub...
One of more than 20 x-ray images taken by AIM Norway, the company that performs heavy maintenance for the Norwegian Air Force. They spent 5-6 hours including report and documentation package! Great job, so much easier than cutting into the tubes.
Thursday, May 16, 2013
Back from X-Ray corrosion check
Picked up MAV today from the military side of Kjeller airport. They took more than 20 X-Ray images of selected tubes and joints. Conclusion: No significant corrosion! Infact, almost nothing at all. Will try to scan and post some examples of the X-ray images soon.
Very happy for the result! And, my quick-fix to pull the L-4 worked very well!
Sunday, May 5, 2013
Removing lower fabric
After engine warmup once again, it was time to start preparing for the x-ray corrosion check. It feels terribly wrong to put a sharp knife against aircraft fabric... at least if you´ve never done it before. I invited a good friend, Knut, who is a qualified glider technician. He was keen as anyone on removing cover! If I had´nt stopped him ti would only be a skeleton left.
We started making a long split under the fuselage. By gently using the hands, the fabric came off easily from the bottom tubes. It´s hard to tell, as little experience as I have, but I thought the tubes looked remarkably "fresh" considering it´s more than 30 years since they last had sunshine. With some luck, Maverick is off for x-ray by the military F-16 maintenance facilities this week. Will bring over the wing struts too for x-ray once they´re at it. Will be very exciting to see the result. Heaven or hell. :-)
Friday, May 3, 2013
Testpilot found!
What a find! And I was getting worried how to get hold of an ice cool test pilot who would remain calm whatever happened on that first flight. I think I´ll call him "Iceman".
Iceman in a small L-4.
Subscribe to:
Posts (Atom)