Wednesday, April 29, 2015

Bit by bit...

Making progress... all those minor things you would not think of... they take time. But it's all coming along really nice now. This will be a good week: our usual Cub building Tuesday night, then the welder will come on Thursday night to hopefully complete exhaust system. Then Friday May 1st is a public holiday = whole day with the Cub! Then we have scheduled rigging Tuesday next week. So this could be the breakthrough we have been waiting for. Perhaps we will finally be ready for some taxing very soon.

Some pictures with comments below.

Even new cowlings from Univair does not necessarily fit well... The top cowling had a gap of almost 2". Should have returned it, but they are probably all made like that.. Talked to someone who had seen it before and recommended to split it in the middle. However we decided to split it on the lower left side to minimize "the impact" and estetics.

Hangar neighbour Oddan and my cousin Sander joining the two parts with round-headed rivets.

Glued on a protection canvas for the top cowling. Made of solid sail-canvas (double).

Impressed by Sander who made the aluminum-piece for the soldering iron which cut perfect holes for the aileron control cable.

Mounting the aileron control cables to the control stick.

Jury struts installed after receiving the correct ones (for the rear strut) form Univair.

Upper half of the door finally attaches to the wing. I wanted a flat-fit there instead of the original mounting on the L-4.

By cheating a little and using Cessna flat drain valves, the hole in the door can be made much smaller.


Monday, April 20, 2015

L-4 stencils

Thanks very much to Tor Nyhus at 335 Squadron of Royal Norwegian Air Force for letting me in to the military paint shop to create all the stencils I needed. Fantastic helpful and friendly guy who has painted many of the great vintage aircraft in Norway, both flying and for museums.
Using the old machines went like a dream, even though they are really old. Some will skip a space and you get two letters on top of each other... but after about an hour I had made them all, except "NO STEP" which will give me a chance to visit the squadron again later...
Meeting people like Tor who wants to help strangers is always great.


Yeah, I have to wear the EXPERIMENTAL tag too... It hurts to put it on, but there is no way around that. At least it helps when it looks "military"..

Wednesday, April 15, 2015

WINGS ARE ON!!!!!!

What a difference! After almost 3 years I have been restoring an airplane which (most of the time) has looked like a pile of tubes and junk. Tonight the wings came on and it suddenly looks like an aircraft again! And it's so quick too!! 3 people, 8 screwdrivers and 30 minutes! :-) Truly a great moment and a major milestone for the project. Thanks again to my cousin Sander and also to Kåre from Aeromech for great help.

Biggest surprise tonight: a Cub can easily carry only one wing without falling over. 
Biggest mistake tonight: turns out we had pulled through the wrong type of control wire. There is one wire going inside the wing, and the other wire going along the wing strut. Neither one matched the original part number, so we had to make an assumption on which to use in the wing. Murphy won again. At first I thought it would be better to take the wings off again, cause pulling those cables through was difficult enough with wings off. But Techinal chief Sander did a great job changing those cables once again. THANKS!! Missing some minor parts (wrong size) like the rear strut clamps (had other Piper ones, probably to later Cub models) which did not fit. Or "fitsn't" as we say.

Next up: exhaust system and upper cowling modifications. Hoping for engine start before the end of April!


Tuesday, March 31, 2015

Instrument panel

With the (finally!) correct combination of tachometer cable length and recording/non-recording type, it was time to mount the instrument panel! The panel was one of the first things I bought for this project after obtaining the aircraft itself. I picked up the panel in February 2013 when I was on a business trip to the US. The instruments are restored and yellow tagged by Keystone Instruments in Lock Haven, PA. The panel itself comes form Clyde Smith who has his workshop also by the old Piper factory in Loch Haven.

OK, once again, I must admit that the panel looks stunning. However, I was a little too quick with the research at the time. It turns out that only L-4A and L-4B models were equipped with cream face instruments. The L-4J should have all black instruments with the exception of the Steward Warner oil temp- and pressure gauge. I'm working on gathering all original instruments for a more authentic panel. I have the B-8 air speed, but missing the altimeter for now.

Once again a big thank you to my cousin Sander who has worked hard preparing all connections to the panel: oil lines, primer fuel lines, static and dynamic etc. And most of all his great effort creating a working BATTERY indicator which is very rare in L-4J's today even if most J models had them.


Sunday, March 29, 2015

Birdcage (almost) complete!


LN-MAV "Maverick" was a modified L-4, resembling a PA-11. That was very common for the ex-military L-4's that came to Norway as US Army surplus material. It was mainly the birdcage and engine cowlings that was modified, so building a birdcage was a lot of work. However, with strips of 1 mm aluminum and a cheap plate bender tool, we managed to do a great job! Just picked up the strips from etch-priming and OD painting a few days ago. Also, the BC-659 radiobox has undergone sandblasting and repainting. The radio was not painted in the same OD as used on L-4's but a darker and more green variant.

Important to drill the holes in the glass larger to avoid cracks. All screw heads was primed and sprayed OD and locknuts was used, with a red plastic which looks more antique than the blank ones. Underneath the strips we sticked a window-sealant foam in order to keep water out. Don't know how well that will perform, but it looks very good from the inside and it was less "messy" than using silicon/Tec-7 etc.

We decided to split the aftmost windows so they can be taken off in order to access the avionics in the aft fuselage such as ELT and antennas.

The US Airforce Insignia star's are also produced and ready. They are made from high quality film of the same type as used on company-ads on cars etc. However, we need higher temperatures to mount those. We're missing only two cross-strips on top before the entire birdcage is done. A huge step forward.

Next up: waiting for a 30" Recording tachometer cable from Univair. When this arrives we can complete the instrument panel mounting. Then the exhaust pipes will be needed to complete the engine installation and it can be started soon...


Friday, March 13, 2015

Engine and tail installation

The key to progress: 3 days off work and a warm hangar... Took "Maverick" over to my EAA Supervisor hangar at Aeromech. Started by mounting the exhaust system... which turned out to be a waste of time because it was heavily modified and would not fit with my brand new cowls. We're trying to weld new ones that will fit perfect.

Next was mounting the engine which had been assembled by professionals.. It was on LN-RAK (another L-4J) and was blown over by heavy gusts on a frozen lake in 1976.. The engine was disassembled and kept in a box ever since I was 4 years old! Engine mounting was pretty straight forward. Once it was on I just had to test-fit the propeller. It just looks so much more like a plane with the prop ON... Will have to get 3" 31/32 prop bolts (on it's way from aircraft-spruce).

Tail also came on during these days. However, we have not finished control cable attachment quite yet. Since I'm off to a business trip for a week we spent all the time finishing the window strips. They are now in for priming and paint. Things are moving forward!

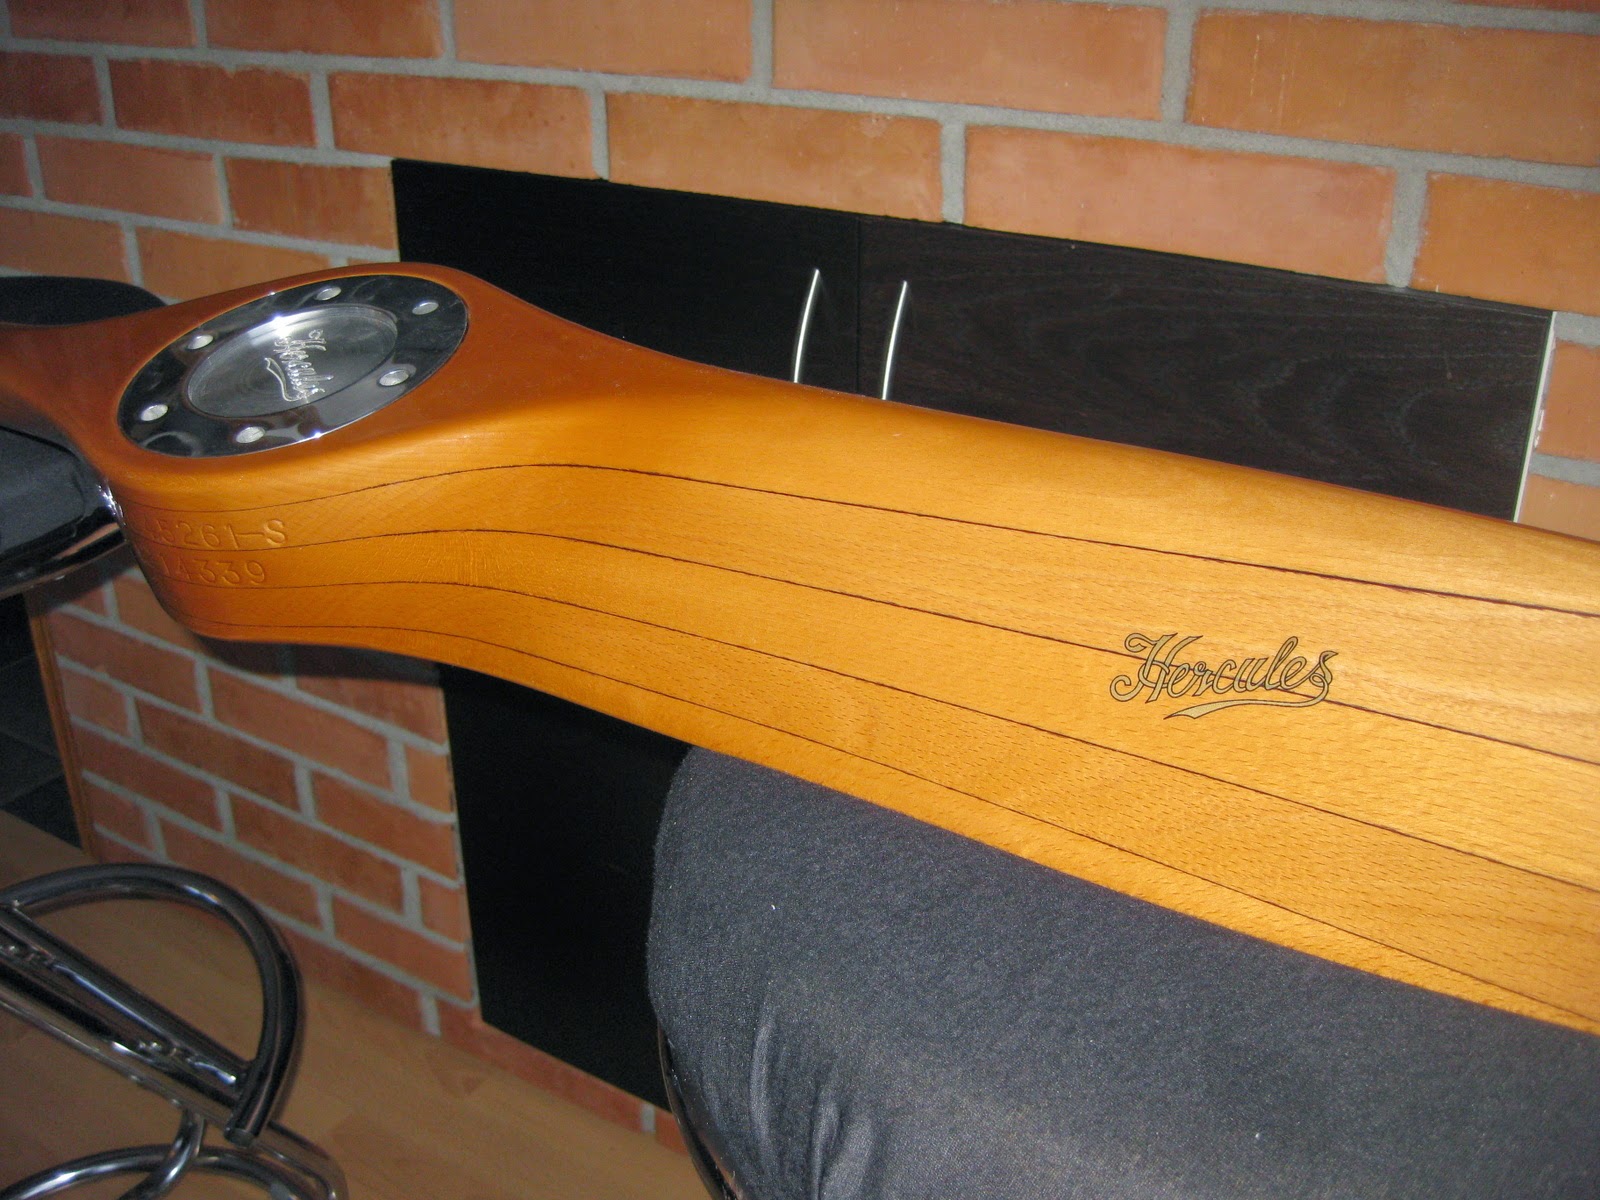
Testfitting the Hercules wooden propeller, a pretty good replica with great improvements such as carbin leading edge.
Tail surface mounted, a challenge to drill the inner cross tube without getting any slack.. 
Full tail on! Remember to cross the elevator cables.. :-)
Back in my own hangar.. happy that the spring seems to be established with temps above 0 most of the time.. 

Now working on exhaust system which will fit the precut hole in the engine cowl, at the same time as giving room for tach cable and oil temp probe. It's pretty packed in there!
Waiting to get back inside. Before first startup we need to finish exhaust system and tachometer cable (needed another angular drive also on the engine side). Then all controls must be attached as well as fuel.. 


Wednesday, February 25, 2015

Fuel system complete

After detecting deep scratches in the existing fuel tubing (from wing- to main tank), we decided to make complete new tubes. The copper tubing came out nice with the olive drab. Plastic protection around the tuning prevents the kind of vibration-induced cuts that we saw in the previous aluminum tubes. My tank does not have the inlets for wingtanks, so it has to go through a T into the drain plug. Flow tests are performed to ensure that we can cross fill more than 150% of a C90 max usage with a good margin. This was a great leap forward, it has taken quite some hours in the cold hangar...

The fuel cap has a doubler around it. This is due to the fact that the boot cowl was not splitted. When fitting it, a couple of rivets broke around the fuel cap area and this is purely a repair to that. They say that "in the good old days" you would get the boot cowls without rivets on the bottom side, so that it could be fitted more gently.

The last pic is the gascolator. I was adviced to use "Steve's Aircraft" Gascolator by friends at the Clyde Smith restoration seminar in Denver. It's a solid gascolator, and we needed to use a doubler in order to get all 4 screws fastened (the pre-cut hole was not right for the bracket). Admit it: it does look expensive! (...and it was...)

We should be all ready for engine installation next week unless my employer sends me off to Nebraska again...


Sunday, February 8, 2015

Firewall / bootcowl

Today we attached the firewall / bootcowl. A challenge to drill the 3 x 2 horizontal holes. Also working on the sidepanels for avionics, fuel valves and mags. Bending new fuel tubes as well.
Next up: waiting for the correct 34" "recording" tachometer cable. Now with firewall attached, we can mount the gascolator. Then we need to finalize windshield strips before instrument panel goes on.


Monday, January 26, 2015

Propeller, antenna and cabin heat box

The highlight of the week: the propeller arrived from Hercules Propellers in Britain. It's a coarse cruise prop with muddy green tips matched with the original Sensenich props. The brown leading edge is in carbon, which makes this prop perform slightly better than the original Sensenich prop due less drag. And it's not imitated wood: it's the real thing! Light weight with a nice alu crush plate.

Also, drilled hole for radio AN-29C antenna connected to the BC-659 radio. This antenna is for authentic looks only and will not be in use. Happy with the tight fit using the rubber O-ring. Not a drop of water will pass through there!

Furthermore, installed the cabin heat box to the bootcowl. Getting seriously close to engine and wing installation now.


The AN-29C antenna sticking up though the birdcage.

The BC-659 radio box will contain an Air Avionics 8.33 kHz VHF with a Garrech Mode S transponder. The VHF unit is currently being developed and will be launched late 2015. So the first season will be flown with a handheld VHF only. The really nice thing with the Air Avionics device is that both the VHF and Transponder will be controlled from a single remote control head. Less "footprint" in the cockpit.

1 kg fire extinguisher, operated with one hand only which is why I selected that particular unit. May spray paint it OD..

Cabin heat box now attached to the bootcowl. Just waiting for the gascolator and tachometer wire now before bootcowl can be attached ONE LAST TIME!! :-)

Cabin heat box seen from the inside. 

There is a kind of system in all this mess...